Elevate Your Burger: Make Crunchy Homemade Dill Pickles Today
There’s an undeniable magic in a perfectly crafted hamburger. The juicy patty, the fresh bun, the crisp lettuce, and that final, essential touch: a crunchy, tangy dill pickle. While store-bought varieties certainly do the job, imagine sinking your teeth into a burger adorned with pickles you made yourself – bursting with fresh flavor, satisfyingly crisp, and tailored exactly to your taste. Making your own hamburger dill pickles at home is not just a culinary endeavor; it's a game-changer for your burger nights and a surprisingly straightforward process that yields a far superior product. Let’s dive into how you can achieve pickle perfection and elevate every bite.
Why Homemade is Always Better: The Benefits of DIY Pickles
The allure of homemade pickles extends far beyond simple bragging rights. When you decide to craft your own batch of
Crafting Crispy Hamburger Dill Pickles: Simple Home Recipe, you unlock a world of benefits that store-bought jars simply can't match.
- Unparalleled Quality Control: You are the master of your ingredients. From hand-selecting the freshest, firmest cucumbers to choosing high-quality vinegar and vibrant dill, every component is chosen by you. This means no artificial colors, preservatives, or high-fructose corn syrup – just pure, natural goodness.
- Customization is Key: Store-bought pickles come in a limited range of flavors. Homemade? The possibilities are endless! Want extra garlic? A touch more heat? A different mix of pickling spices? You dictate the flavor profile, ensuring your hamburger dill pickles are exactly how you like them.
- Superior Crunch and Freshness: The speed at which fresh cucumbers are transformed into pickles at home is often much quicker than commercial operations. This, combined with careful selection and preparation, results in an incredibly crisp pickle that snaps delightfully with every bite – a crucial characteristic for the perfect burger topping.
- Cost-Effectiveness: While there's an initial investment in jars and ingredients, making pickles in larger batches at home can be significantly more economical than consistently buying premium store-brand pickles. Plus, the satisfaction is priceless!
Ultimately, making your own
hamburger dill pickles is an investment in flavor, health, and culinary adventure. It's about taking ownership of your food and creating something truly special that enhances one of America's favorite comfort foods.
The Foundation of Flavor: Choosing Your Cucumbers Wisely
The journey to an exceptional
hamburger dill pickle begins with the star ingredient: the cucumber. Not all cucumbers are created equal when it comes to pickling. The wrong choice can lead to soft, mushy, and disappointing results.
Understanding Pickling Cucumbers
Ideally, you'll want to seek out cucumbers specifically bred for pickling. These varieties are typically smaller, firmer, and have thinner skins and fewer seeds than the common salad cucumbers found in most grocery stores. Their robust texture holds up beautifully to the brining process, ensuring that satisfying crunch.
Some top contenders for pickling include:
- Kirby Cucumbers: Often considered the gold standard, Kirbys are small, bumpy, and wonderfully firm. Their thin skin means less bitterness and a consistently crisp texture.
- National Pickling Cucumbers: As the name suggests, these are excellent for pickling. They are blockier than Kirbys and offer a great, sturdy crunch.
- Boston Pickling Cucumbers: A classic heirloom variety, known for its consistent size and robust flavor, making it a reliable choice for traditional dill pickles.
Avoid using larger, smoother varieties like English, Persian, or regular slicing cucumbers. Their high water content, thicker skins, and larger seeds can lead to a less desirable, often mushy, pickle texture.
Freshness is Paramount
Regardless of the variety, freshness is non-negotiable. Always look for cucumbers that are:
- Firm to the Touch: Give them a gentle squeeze. They should be hard and unyielding, without any soft spots or blemishes.
- Vibrantly Green: Avoid any cucumbers with yellowing or dull skin, which are signs of age.
- Immediately Processed: For the absolute best crunch, try to pickle your cucumbers within 24 hours of harvesting or purchasing. The longer they sit, the more moisture they lose, potentially impacting their crispness. If buying from a store, check for recent delivery dates.
A pro tip for extra crunch: Once you have your fresh pickling cucumbers, give them an ice bath for an hour or two before slicing and packing. This helps firm them up even further!
Crafting the Perfect Brine: A Symphony of Sweet, Sour, and Spice
The brine is the magical elixir that transforms a humble cucumber into a tangy, flavorful pickle. It’s a delicate balance of acidity, saltiness, and aromatic spices. Mastering your brine is key to creating those irresistible
hamburger dill pickles.
Essential Brine Components
Each ingredient plays a vital role in both flavor and preservation:
- Water: Always use filtered or distilled water. Tap water can sometimes contain minerals or chlorine that might affect the flavor or color of your pickles.
- Vinegar: White distilled vinegar (5% acidity) is the most common choice due to its clean, neutral flavor, allowing the dill and other spices to shine. For a slightly sweeter, more complex, and nuanced profile, you can experiment with apple cider vinegar, also at 5% acidity. The acidity is crucial for food safety and preventing spoilage.
- Salt: This is not the time for your everyday table salt! Pickling salt (also known as canning salt) is ideal. It’s pure sodium chloride, lacking iodine and anti-caking agents that can cloud your brine and darken your pickles. If pickling salt isn't available, pure kosher salt (without anti-caking agents) is a suitable substitute.
- Sugar: A small amount of granulated sugar is often included. It doesn't make the pickles sweet, but rather balances the sharp acidity of the vinegar and enhances the overall flavor, creating a more well-rounded taste.
- Spices: This is where the magic happens and you can truly customize your pickles. The classic dill pickle features a specific array of aromatics:
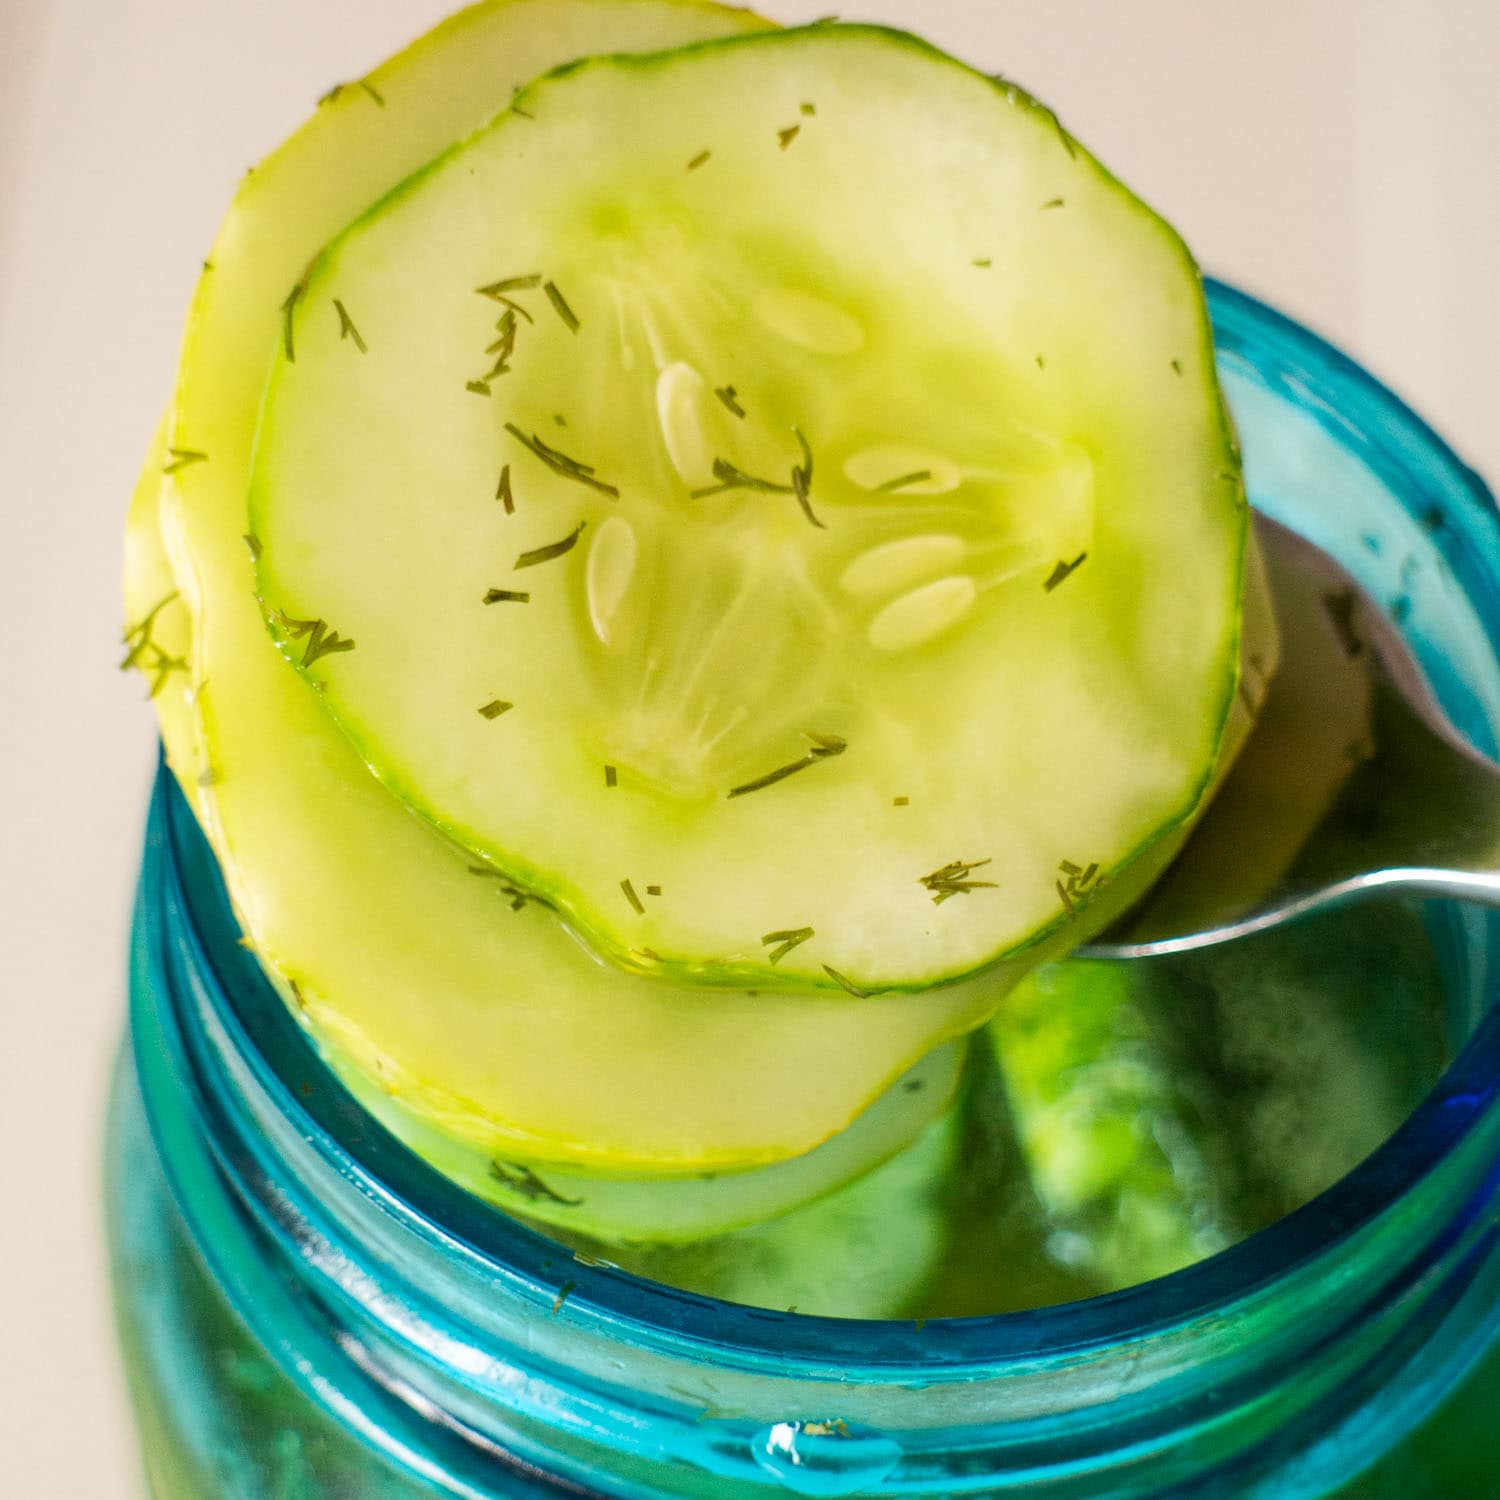
- Dill: Fresh dill heads, dill weed, or dill seeds are essential. Fresh dill adds a brighter, herbal note.
- Garlic: Peeled whole cloves or thinly sliced garlic infuse a pungent depth.
- Mustard Seeds: These provide a subtle tang and a classic pickle flavor.
- Black Peppercorns: Offer a mild, peppery warmth.
- Red Pepper Flakes (Optional): For those who like a little kick in their hamburger dill pickles.
- Other Ideas: Consider bay leaves, coriander seeds, or even a tiny pinch of turmeric for color and earthy notes.
For more insights into how specific ingredients can enhance texture, be sure to check out Unlock Crispy Perfection: The Secret Ingredients for Homemade Hamburger Dill Pickles.
A Basic Brine Recipe (Adaptable)
This recipe is a great starting point for 4-5 pint jars of pickles:
- 4 cups filtered water
- 4 cups white distilled vinegar (5% acidity)
- 1/4 cup pickling salt
- 1/4 cup granulated sugar
- 2 tablespoons dill seeds (or several fresh dill heads)
- 4-6 cloves garlic, peeled and gently crushed
- 1 tablespoon black peppercorns
- 1 tablespoon mustard seeds
- 1/2 teaspoon red pepper flakes (optional, for heat)
Combine all brine ingredients in a large, non-reactive saucepan. Bring the mixture to a rolling boil over medium-high heat, stirring occasionally until the salt and sugar are fully dissolved. Reduce the heat and let it simmer for at least 5 minutes. This allows the spices to meld and infuse the liquid with their fragrant oils. Keep the brine hot while you prepare your cucumbers and jars.
From Cucumber to Crunch: The Pickling Process Step-by-Step
With your fresh cucumbers and flavorful brine ready, it's time to bring them together. This step-by-step guide will ensure your pickles are perfectly prepared for your next burger.
1. Prepare Your Jars and Lids
If you plan to can your pickles for shelf-stable storage, you'll need to sterilize your jars and lids according to canning guidelines. For simple refrigerator pickles, thoroughly wash and rinse your jars and lids with hot soapy water. Ensure everything is sparkling clean.
2. Prep the Cucumbers
Wash your cucumbers thoroughly under cold running water, gently scrubbing away any dirt. Trim off both the blossom and stem ends – particularly the blossom end, as it contains enzymes that can lead to softer pickles. For classic
hamburger dill pickles, slice your cucumbers into 1/4-inch thick rounds. If you prefer spears, cut them into quarters lengthwise.
3. Pack the Jars
This is where you arrange your ingredients strategically. For each clean jar:
- Place 1-2 cloves of fresh garlic at the bottom.
- Add about 1/2 teaspoon of dill seeds (or a small fresh dill head/sprig).
- Add 1/2 teaspoon mustard seeds and a few black peppercorns.
- If desired, a pinch of red pepper flakes.
- Carefully pack the cucumber slices or spears tightly into the jar. The tighter they are packed, the less likely they are to float, and the more pickles you'll fit!
4. Pour the Brine
Once your jars are packed, carefully pour the hot brine over the cucumbers, leaving about 1/2 inch of headspace (the space between the liquid and the rim of the jar). Tap the jars gently on the counter to release any trapped air bubbles. If necessary, top up with more brine.
5. Seal and Cool
Wipe the rims of the jars clean with a damp cloth. Place the lids and screw on the bands until finger-tight.
- For Refrigerator Pickles: Allow the jars to cool completely at room temperature, then transfer them to the refrigerator. They will be ready to eat in about 24-48 hours, but the flavor will deepen over a week. They typically last several weeks to a month in the fridge.
- For Canning (Shelf-Stable): If you are aiming for long-term, shelf-stable storage, you must process the jars in a boiling water canner according to tested recipes and guidelines to ensure food safety. This usually involves processing pint jars for 10-15 minutes, adjusting for altitude.
Tips for Maximizing Crunch
To achieve that ultimate snap in your
hamburger dill pickles:
- Freshness First: As mentioned, pickle cucumbers within 24 hours of harvest.
- Ice Bath: Chill cucumbers in an ice bath for an hour before slicing.
- Trim Ends: Remove both ends of the cucumber, especially the blossom end.
- Grape Leaves: Adding a fresh grape leaf to each jar can sometimes help maintain crispness due to its tannin content.
- Firm Packing: Don't be afraid to pack those cucumbers in tightly.
The Ultimate Burger Companion Awaits
There’s an immense satisfaction that comes from creating something delicious from scratch, and homemade
hamburger dill pickles are no exception. Imagine biting into a juicy burger, perfectly complemented by a crisp, tangy, and flavorful pickle that you crafted with your own hands. It’s a small detail that makes a huge difference, elevating a simple meal into an unforgettable culinary experience. So, ditch the bland store-bought jars and embrace the rewarding process of making your own crunchy, zesty dill pickles. Your taste buds, and your next hamburger, will thank you for it!